
Introduction
Hi there! This is our first opening post!
We wanted to start with a big bang, so in the next few weeks we will show you all the required steps to play an unlimited-length 20-fps 65536-color 160×128 pixel video, with 16-bit 20-ksps audio on an Arduino Uno. We worked hard to optimize everything and the results can be seen in the video at the bottom of the page!
Before starting our journey, here is some background.
Arduino is one of the most preferred development tool for many hobbyist, developers and enthusiasts.
The availability of many libraries, examples, tutorial and plug-in cards (as known as shields) allowed its widespread diffusion, and with almost no effort you can blink LEDs, drive relays, perform some home automation, or have it networked through WiFi or Ethernet… Or you can use your smartphone and send data through Bluetooth. And there are also many shields or boards with graphic displays.
With these display shield, showing static colorful images is quite an easy task.
However, the computing power and the memory capacity of entry level Arduino boards are very limited, and playing a video could be very tricky, even at low resolutions. In this tutorial we want to show you how you can actually play an unlimited-length video on Arduino!
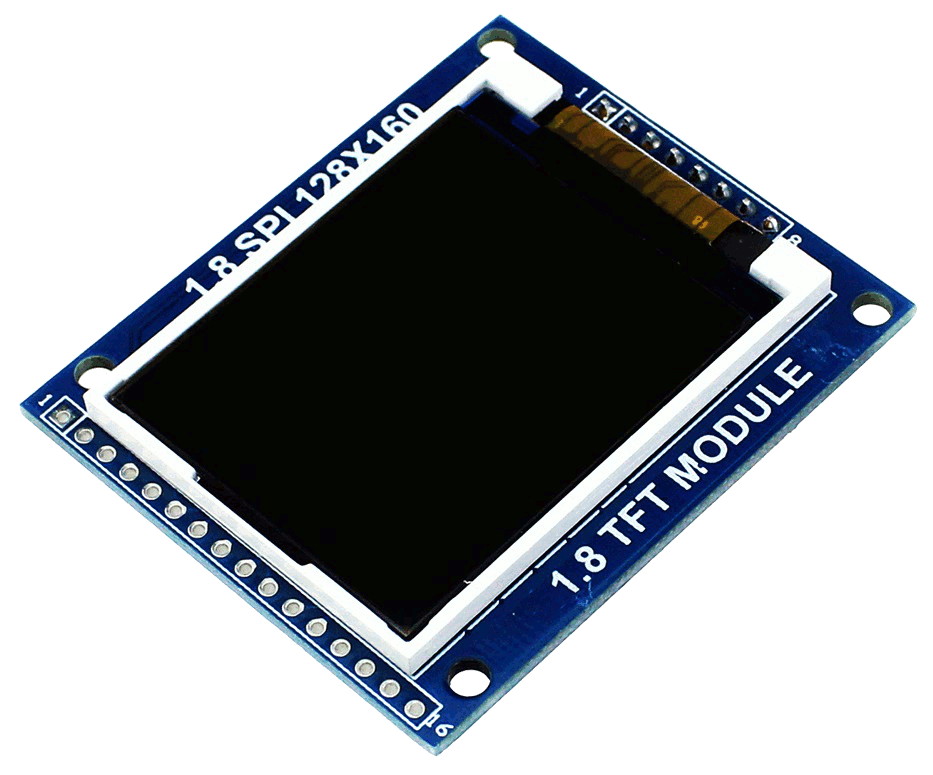
Of course, you cannot expect a 1080p video, so we found a good tradeoff with the 160×128 resolution. This is the typical resolution of readily available 1.8” SPI displays. Such resolution also allows us to achieve a good frame rate. In fact, 20 fps are very close to the maximum theoretical frame-rate that could be achieved on such a display. This is due to the clock limitation of the Arduino, which gives us a maximum 24.4 fps. Of course, if the microcontroller is clocked at its maximum speed, we could achieve an even higher framerate, such as 25. However changing a quartz from 16MHz to 20MHz is a trivial task, and it’s not worth of further discussion: the programs we will provide you are fully compatible even with 20MHz parts, provided you changed the F_CPU #define from 16000000 to 20000000.
The 20kHz audio sample frequency follows the 20fps limitation. Still, 20ksps at 16 bit sound pretty good, as you might hear. Of course the audio quality will be a bit worse than a regular 16-bit 20-kHz sound, because the sound is achieved through PWM.
The tutorial is organized as follows (links will be available when we upload the episode!):
- Introduction (this episode)
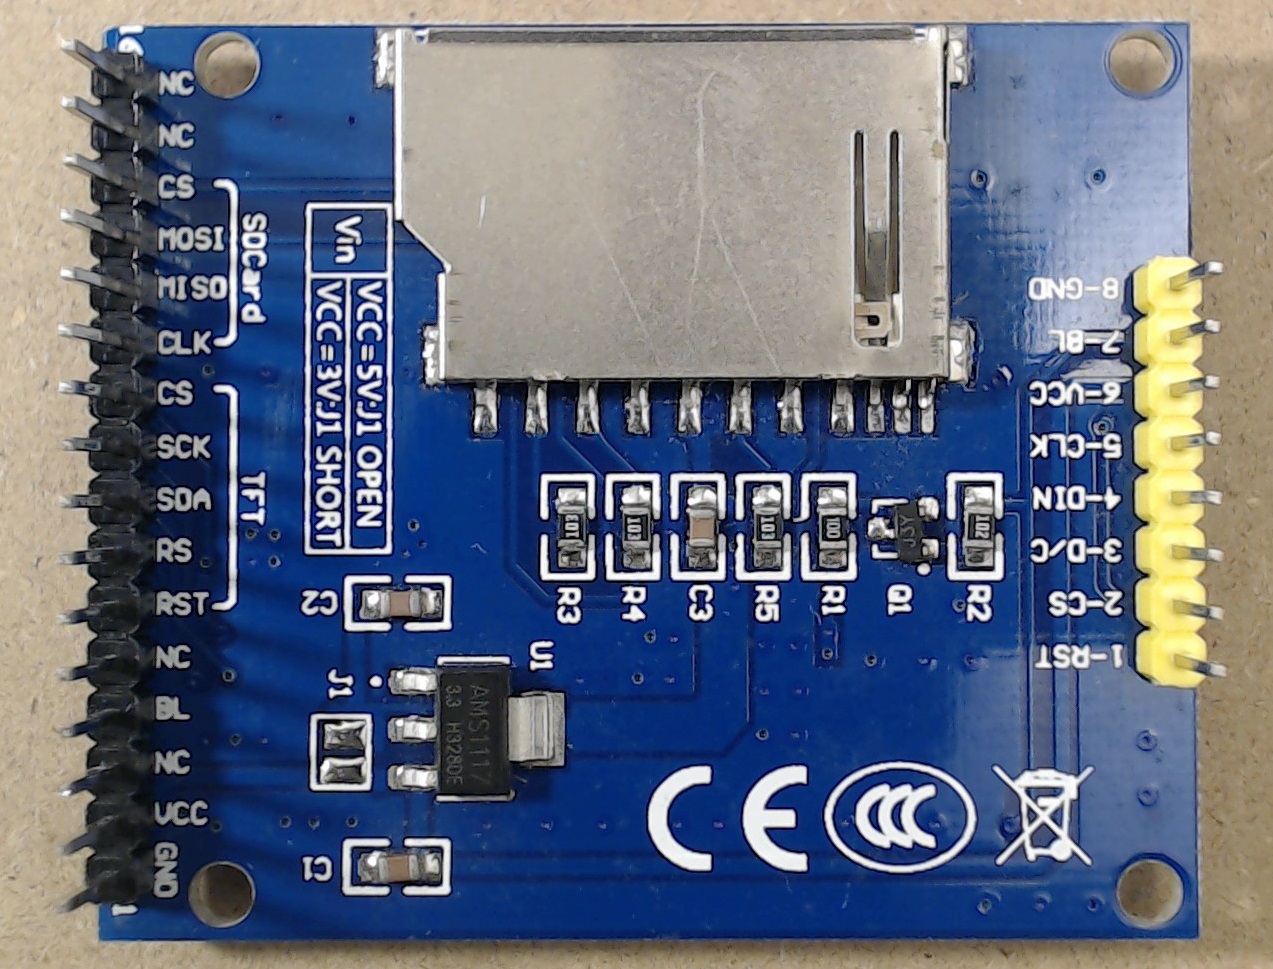
- We will first show you how to modify a popular TFT+SD module (Fig.1), to achieve 8MHz transfers.
- Then we will discuss about SPI vs USART in SPI mode. This will be a crucial point to achieve the maximum frame-rate.
- After that much waiting, we will give you what you wanted: a smooth 20-fps video (with no audio). A couple of tricks will be shown in this episode, be sure not to miss it!
- We will then deal with the audio: hardware and software!
- Final step: audio and video. This was not trivial. We had to make further software optimizations to get a fully flawless audio-video playback! We will show you these in details!
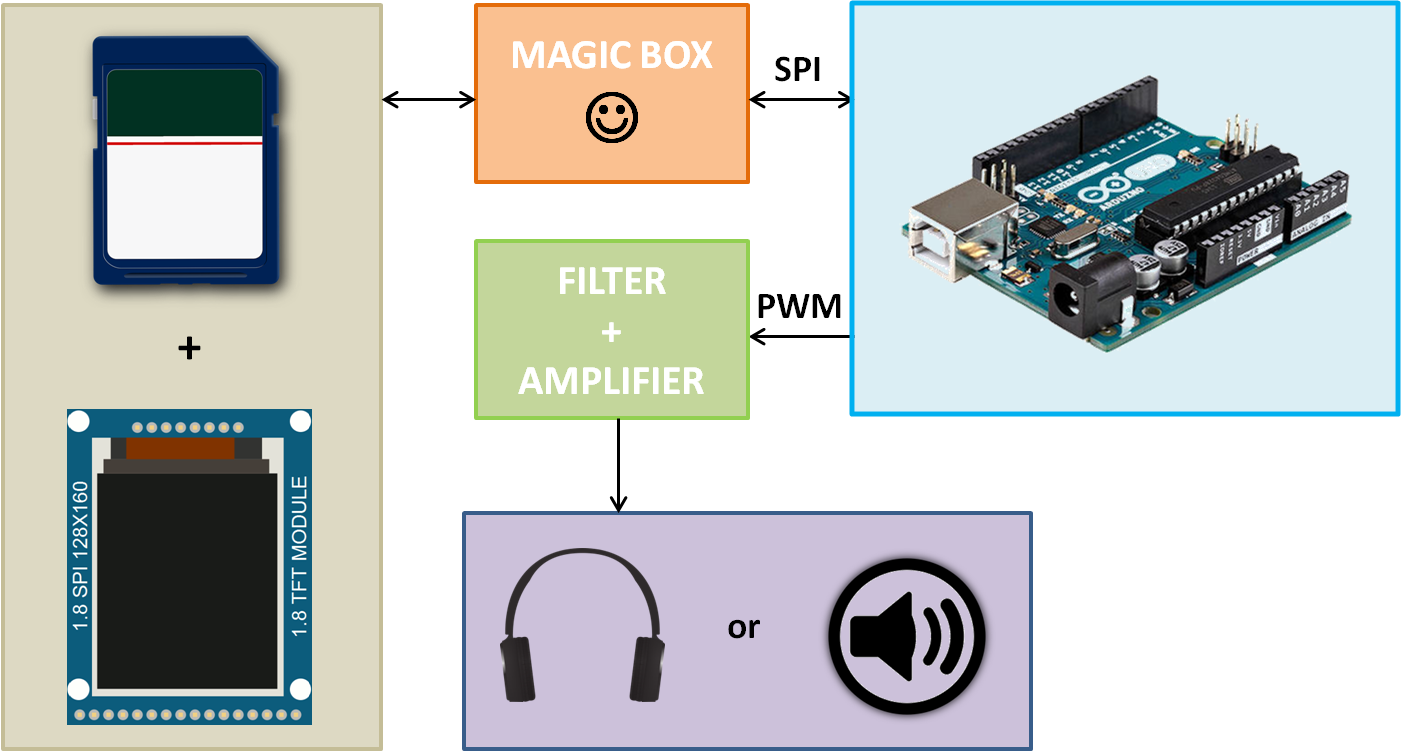
The block diagram is very simple (see fig above):
- the Arduino Uno
- the display (which includes the SD card connector)
- the audio part, which converts PWM signal into analog signal suitable for the earphones.
- And… a magic box! Yes, that box will do a lot of magic. You’ll be surprised how simple it is, and that’s the hack! Want to know more? Be patient! We will show you everything in the next episodes!
Watch the videos on our youtube channel next-hack! Subscribe to get all the updates and share with your friends!
Direct link to the youtube video of this episode available here.
So, enough talking, let’s start with the next-hack and proceed with the next step!