
Sprites
What are sprites? Sprites are movable/dynamic graphics elements, typically the player, projectiles, enemies, bonuses, etc. As a such, they are extremely important, and in this tutorial we are going to show how to draw them on screen, using uSVC.
Sprites vs tiles in uSVC:
- Unlike tiles, sprite can remain in flash, there is no need to copy them to RAM before drawing.
- Sprite can be placed everywhere on screen, and not just on an 8-pixel grid as tiles.
- Sprites can be flipped or rotated.
- Sprites can have any size between 1 and 128 pixels, in width or height, while tiles are always 8×8 pixels.
- Sprites must be drawn each time the map is redrawn. Tiles are not actually drawn: only the reference on the vram table is refreshed, therefore tiles are much faster than sprites.
- In normal consoles, sprites consume a high bandwidth on the video chip, therefore there is typically a limitation on how many sprites can be shown per scan-line. There is no such “sprites-per-scanline” limitation on uSVC. However, there is a limitation on the total number of pixels that can be drawn on the whole screen. As a rule of thumb, 9000 pixels is the maximum number of pixels that can be drawn per frame[1]. This number varies a lot with the size of sprites. Bigger sprites are drawn more efficiently than smaller one. For instance, you can draw nine 32×32 pixel sprites (about 9000 pixels) or “just” 66 8×8 pixel sprites (only 4000 pixels).
How do sprites sprite drawing work on uSVC? Let’s suppose we want to draw a sprite. Our VGA signal generation routine can only draw tiles, not sprites! Something must convert sprites to tiles, and this is automatically performed by the kernel, but understanding how it does work will help to understand also the limitations.
Sprites might have completely transparent pixels, and these pixels are marked with color index 0. This implies two things:
- In the current kernel, in 256 color modes, sprites cannot have a purely black[2] pixel, and actually sprites can have only 255 colors. As a replacement, one can use very dark brown or dark green. This is not usually a problem, as the very dark brown / green are quite close to the black and the user won’t notice too much difference. In 16-color mode, there is no such limitation (black color, if needed, can be put to any other index from 1 to 15), but this also means that sprites have only 15 colors, because color index 0 is transparent.
- Even if sprites are always rectangular, they can appear as arbitrarily shaped.
Let’s suppose we want to place a sprite, as shown below. The system will find on which tiles the sprite will lie.
For each tile highlighted above (see light blue dashed line), the system will perform these operations:
- It verifies if in the tile there will be some non-transparent sprite pixels. If there are just transparent pixels, no action is taken for this tile. The same will occur if the tile is completely opaque (no black pixels) and the tile has a higher priority than the sprite[3].
- It copies the tile to a temporary tile.
- It saves the old tile reference in the vram to a particular variable, and it replaces it with the reference to the new temporary tile.
- It draws the part of the sprite belonging to the tile region over or under the new allocated tile, depending on the priority.
For instance, in the example above, there are non-black sprite pixels on tiles named 0, 1, and 2 (numbers in the figure above are just an alias). Allocations of new tiles and drawing will occur. There will be no tile allocation and copy for tile 3: all sprite pixels are black. This will save one tile.
What about if a sprite is drawn in a region where another sprite has been drawn? Well, we didn’t tell you the whole story :-). In fact, before allocating any new tile, the system will check if the destination tile points to the “real” tiles, or if it was a temporary one. In the latter case, no new tile allocation and copy will occur, and the sprite will be just drawn over (or under, depending on the priority) the destination tile, saving a copy operation and some memory too.
That said, where are allocated those temporary tiles? In the “tiles” array. In fact, the VGA signal generation routine does not distinguish between “regular” tiles and tiles with sprites. As a result, one should declare the MAX_TILES constant larger than the exact number of background tiles, which are stored in the tileset.
For instance, if your tileset has 100 tiles, and you want to draw only one 8×8 sprite, you should declare MAX_TILES at least 104. How does the number 4 come out?
Well, it is a simple rounding matter, which can be already inferred from the figure above. In principle, sprites can be placed anywhere. An 8×8 pixel sprite might occupy between 1 and 4 tiles, depending on where it is drawn. Of course you should reserve 4 tiles, i.e. the worst case.
For bigger sprites, of course you need more tiles. For instance, a 16×32 pixel sprite will occupy at least 2 x 4 tiles (assuming all pixel being non black), and at most 3×5 tiles. In some circumstances (e.g. in bonuses), some sprites might be placed always at 8-pixel boundary, therefore they will always occupy the minimum number of tiles (e.g. 1 if they are no bigger than 8×8). We verified that you can draw more than 128 8×8 sprites if they are placed at 8×8 boundaries.
The position, frame number, and flags (rotation, handle point, priority, etc) of each sprite are stored in a list (actually an array). Each time we will call the function putSprite(), the entry specified by the sprite number will be filled. Once we have called putSprite() for all the sprite we want to draw, we can call drawSprites(), which will actually perform the sprite data rendering.
The second tutorial
Enough talk for today. Let’s get our hands dirty!
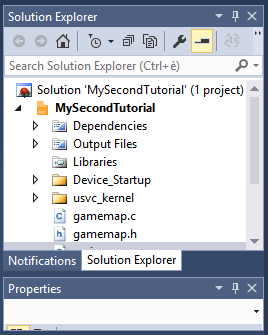
In this tutorial we want to draw both tiles, and sprites. Since we have already drawn some tiles in the previous tutorial, we will use the same project. Therefore copy the project directory, and change the project name in Atmel Studio (remember? Click on the project name in the solution Explorer and press F2). We changed it to “MySecondTutorial”.
Last time we provided you with the graphics, so that we focus on programming. This time, we are providing you with some sprites too, so that we just focus on how to place and show them. However, once you have finished this tutorial, we strongly suggest you to draw your own graphics using GIMP, and then use the uChip Game Map Editor to export them to C files.
The sprite data are contained in the file VGASpritesData.c, and it is exactly as it is produced by uChip Game Map Editor. For this reason, you need to split this file in two parts: a header and a C file, like we did in the previous tutorial for the tile and map files.
In particular, in the file we provided, you will find two comments: “//Copy the following lines to a header file!” and “//Copy the following lines to the C file!”
So, let’s copy everything between the first and the second comments in a header file: let’s call it VGASpriteData.h (see last tutorial if you don’t remember how to create and add a header file to the project). Note! You must copy the aforementioned part AFTER the line #define VGASPRITEDATA_H_, which is automatically generated by Atmel Studio.
Then, copy everything after the last comment to .c file: let’s call it VGASpriteData.c. The first line of code in the C file will be: #include “the header file in which you put the previous line.h”.
You have to modify this line to include the header file you create before, i.e. the line should be: #include “VGASpriteData.h”.
You need also to include “VGASpriteData.h” at the end of uSVC_Config.h, like we did below:
Furthermore, in usvc_config.h we need to set to 1 the constant “SPRITES_ENABLED”.
So, how to draw a sprite?
The typical drawing cycle (for each frame) is as follows:
waitForVerticalBlank(). This will halt the program execution, until the frame has been completely shown onscreen (i.e. resume will occur when we are at line 401, the first one of the black lines).removeAllSprites(). This will clear the list of sprites to be drawn onscreen. Optionally, it will restore the saved vram references (to the original tiles. Do you remember?), and deallocate the previously allocated temporary tiles for the sprites.drawMap(). This function is very game specific, therefore it is not part of the uSVC kernel, and should be implemented ad hoc for each game. The name does not even need to be “drawMap()”. The function of this, ehm, function is to redraw the map. In a future post, we will show that actually redrawing the map every time is not necessary. For now, we just use the function we wrote for the first tutorial.putSprite(). This function can be also called before drawMap() (but after, of course, removeAllSprites());
This function requires the following arguments:
– Number. It is the index of the sprite, and it must be smaller than the constant “MAX_ONSCREEN_SPRITES” defined in usvc_config.h, otherwise the function will return immediately. For normal sprite priority, higher number means that they are drawn later, i.e. on top of existing graphics. For sprites with “always bottom priority”, the relationship with the sprite index is opposite (higher number are drawn first).
–xandy. The sprite coordinates. Normally (i.e. without any additional flags), the coordinates are screen-relative, i.e. 0,0 correspond to the top-left pixel of the screen, regardless the scrolling. We will see in the next tutorial (when we will deal with scrolling) what this means.
– flags. These are used to change the sprite handling point, mirroring, rotation, priority,etc. A list of flags is available in vgaConstants.h.
– frame number. The frame of the sprite, starting from 0.drawSprites(). This function will draw all the sprites in the sprite list (array).
Before we finally draw the sprite, one more thing. We told you that the temporary tiles allocated for the sprite share the same array of the tiles, which were copied from flash to RAM. How can the sprite engine distinguish between a regular RAM tile and a temporary sprite tile? By setting the number of ramtiles (called ramtiles because these are the tiles that were copied to RAM).
We added a function “setNumberOfRamTiles()”. We recommend calling this function just before or just after calling the memcpy function that copies the tiles from flash to RAM. The parameter is of course the number of tiles to reserve as ram tiles. This is defined in romTiles.h, as MAX_TILE_INDEX.
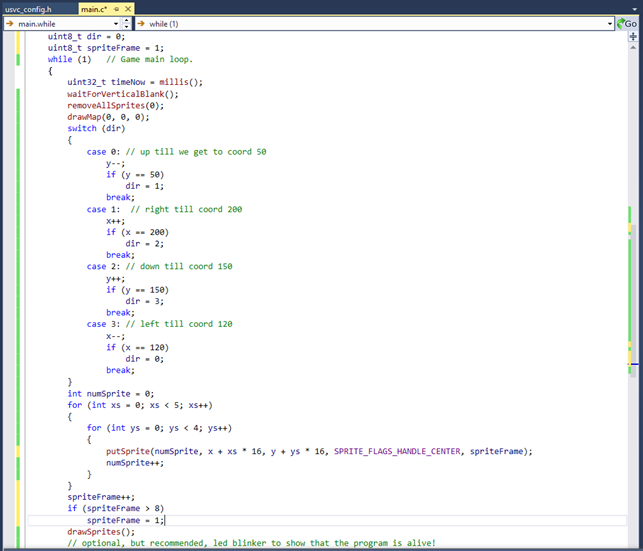
So, after all this, the final main() function source will be like this:
If you build and upload the program in debug mode (see previous tutorials), you should see the following screen:
Well… yes, we plotted a sprite… But… it is quite boring isn’t it ? Let’s move it!
Nothing simpler than this! Let’s have it to move in a square pattern. For this operation, we define three new variables (x, y, and dir) and we create a simple algorithm shown below:
Very simple, right?
Now let’s draw 19 more sprites… To do this, let’s write the following code snippet.
If you compile the project and upload it to uSVC in debug mode, you’ll see that something is missing! Only 16 sprites are shown, instead of 20!
To correct this, we must change the MAX_ONSCREEN_SPRITES value in usvc_config.h to at least 20, as shown below.
You should see now the correct number of sprites!
Now, let’s change the sprites to something bigger, and add an animation. In frames 1 to 8 we have stored a rotating coin (Credit: Pudding from Open Game Art, https://opengameart.org/content/rotating-coin). By the way, this sprite is bigger than the smiley. Let’s change it, by modifying the code like we have shown below:
Let’s compile, and upload… to get something disappointing! Some sprites have some missing or flickering parts!
This is again due to the wrong settings in the usvc_config.h.
In fact, in usvc_config, the number of tiles was set to 100. Of these 100 tiles, “MAXTILEINDEX” (defined as 15 in romTiles.h) are reserved for the ramTiles by the function call setNumberOfRamTiles(MAXTILEINDEX).
Therefore, 85 tiles remain for our 20 sprites. Are them enough? These sprites are approximately 16×16 pixel, and they are printed exactly with a 16-pixel spacing. Therefore you can consider it as if it was a single sprite, of 64 by 80 pixels. This means that, as we said before, it will require 8+1 tiles multiplied by 10+1 tiles. This means that all these sprites, with this arrangement, require 9×11 tiles, i.e. 99 tiles, in the worst case
To fix the problem you have to change MAX_TILES in usvc_config.h from 100 to 99+15, i.e. 114.

If you rebuild and upload the code, you won’t get any flickering or glitches!

We want to stress that not by mistake we highlighted “with this arrangement”. In fact, when sprites are close together they can share the tiles, therefore the tile usage is smaller.
Drill question: how many tiles would those sprite require in the worst case, if they were space, let’s say 32 pixel (in both horizontal and vertical positions)?
Spoiler (select with the mouse to show!): 180 (195 if we include the 15 background tiles). Why?
Finally, try to set some flags (described in vgaConstants.h) ! To set a flag, you should use the bitwise or operator. For example, in the “flags” parameter of putSprite() you set (SPRITE_FLAGS_HANDLE_CENTER | SPRITE_FLAGS_ROTATE_90), you will get all the coins rotated by 90°.
More on the putSprite() function
As we said, putSprite() accepts the sprite index (from 0 through MAX_ONSCREEN_SPRITES - 1, the x and y coordinates, the flags, and the image (or frame) index. We did not tell you that this function has a return parameter too: the success or failure of the operation.
The putSprite() will return 0 if the sprite won’t be visible because it is off-screen, or if you chose a sprite index too large. In fact, the function will calculate if the sprite will completely lie outside the visible area.
Some of you might have recognized that x and y are signed integer. This is because sprites can be placed even at negative coordinates, so that they are partially visible. For instance, consider you have a square 3×3-pixel square sprite, and you use the flag SPRITE_FLAGS_HANDLE_CENTER, if you put the sprite at coordinates (x, y) = (-1, -1), you’ll see exaclty one sprite pixel at position (0, 0).
Conclusions
That’s all for this tutorials. There are a lot of more advanced features to tell you about sprites, priorities, etc, but these will be the topic for further tutorials in the future!
We strongly encourage you to try several modifications to this code. In the next episode, we will cover another extremely important aspect: smooth scrolling.
See you next time!
[1] Actually the limitation is: 1) In number of sprites 2) in number of allocated tiles, and 3) total number of pixels, whichever comes first. The maximum number of sprites and tiles are limited by the total memory.
[2] In a future kernel version under development, you will be able to change the transparent color, so that you can choose which one of the 256 colors you will sacrifice.
[3] Sprites and tiles can have priorities. For this tutorial, sprites will have always a higher priority with respect to tiles.