
Note! If this is your first project, please refer to the previous article, in order to setup Atmel Studio for uSVC.
The goal of this first tutorial is to draw something onscreen, but before actually drawing something, you need some… graphics! This time, we provide you with some graphics already exported to C files (as they are provided by the map editor), so that you can now focus on programming. We already explained some basics about the editor: you are encouraged to change the graphics later.
Here is the summary of this first tutorial:
- Setting up Atmel Studio for uSVC: (see previous article)
- Creating an Atmel Studio Solution (see previous article)
- Configuring uSVC Kernel
- Drawing a Tile
- Drawing a map.
Configuring uSVC Kernel
As said in the previous article, each uSVC project must include the following files:
- The usvc_kernel directory, with all the kernel files.
- The main.c file, where the main function resides.
- The main.h file, where you can include all the file headers you are going to use in your project. This allows you to include just “main.h” instead of having to include multiple headers.
- The kernel configuration file, usvc_config.h
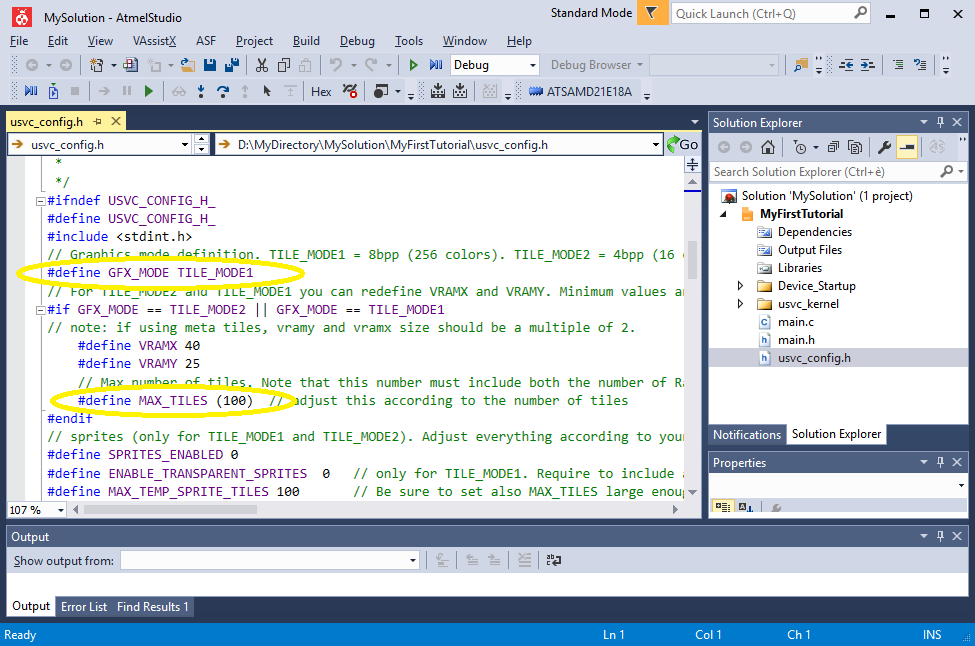
Usvc_config.h is the file that configures the kernel. Let’s check it!
As you might see, after the comment, you’ll will find a lot of defines. These enable (1) or disable (0) the features, or set the values of various parameters.
For our first project, we will have only to set the graphics mode (GFX_MODE), and the number of tiles. We won’t use audio or other amenities, therefore everything else will remain defined as 0. We want to work with 256 colors, and we want to be able to use up to 100 tiles. Therefore, let’s set the GFX_MODE to TILE_MODE1 and define MAX_TILES as 100.
The file should appear like this:
Wait, what is a tile? More on that later! (Well, you could also check the article about uChip Game Map Editor).
Including data files
Games require data files: graphics, audio, level data, etc. For now, we just focus on the graphics.
In this tutorial, we already provide the graphics (see below), so that you just have to include the c and header files.
Actually, the uChip Game Map Editor does not create the header file, as it would be application specific. Instead it creates only one C file, and, in that file, it tells you where you should put each block of code. Do not worry, we will explain this step by step, so everything will be clear.
As mentioned before, if you want, you can use the uChip Game Map Editor to create your own graphics for this tutorial.
To include the files containing the graphics data, you have to:
- Download and unzip somewhere the “Tutorial1_romtiles.zip”.
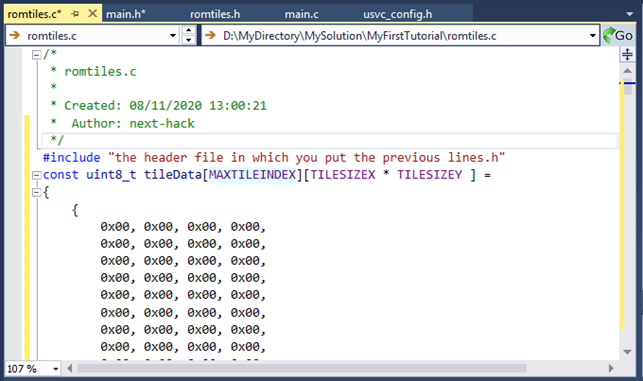
- Open “romTiles.c” with a text editor (notepad is fine, but we use ConText, because it automatically detects the source language, based on the file extension). You should see something like this:
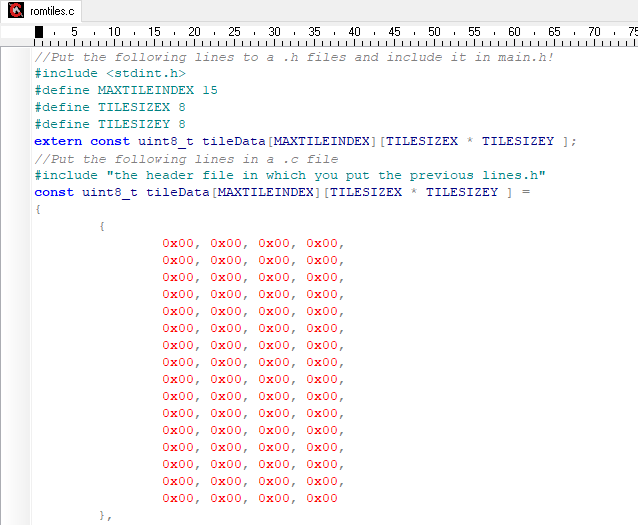
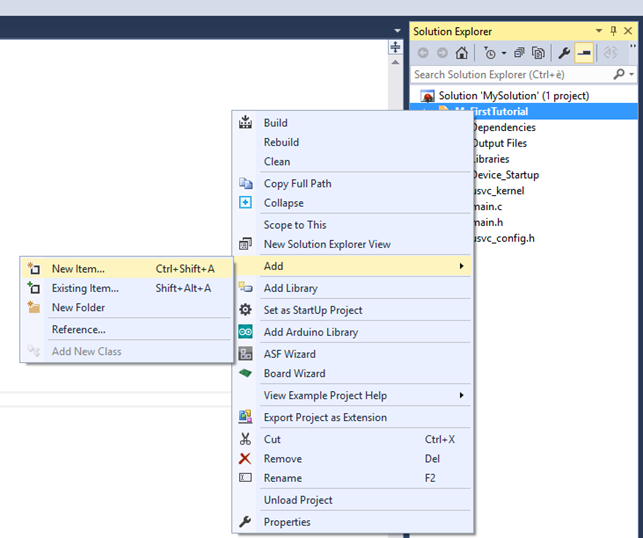
- As you might see, the first comment suggests you to put the first 5 lines in a header file. To do this, on the solution explorer window (right), right click on your project name (in our case “My First Tutorial”), select Add, and then “New Item”, like it is shown below.
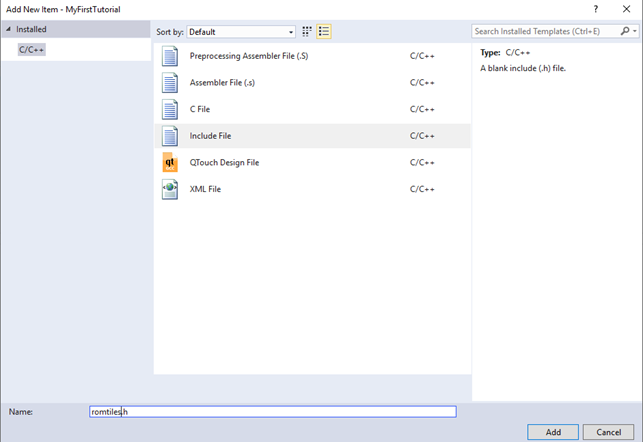
- A window will appear. Choose “include file” and give it a name (e.g. romtiles.h), and press “add”.
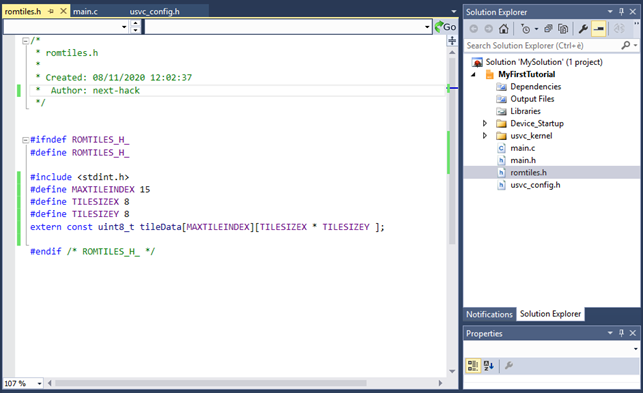
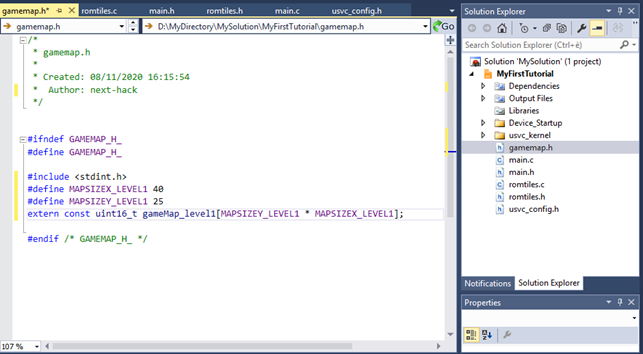
- You’ll find that the romtiles.h file has been added to your project. Let’s open it (click on “romtiles.h” in the solution explorer window, on the right) and copy the first 5 lines of code (after the comment, of course). You should see something like this:
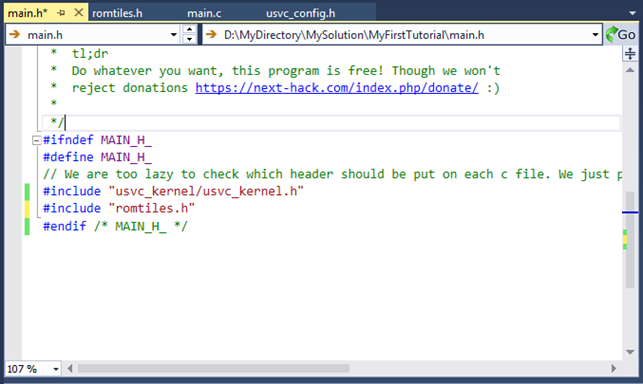
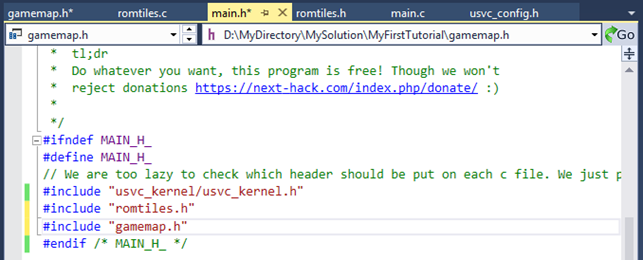
- Now, click on main.h, to open it, and before the last
“#endif” line (or equivalently: after “#include "usvc_kernel/usvc_kernel.h"“) add the line:
#include "romtiles.h"
It should be like this:
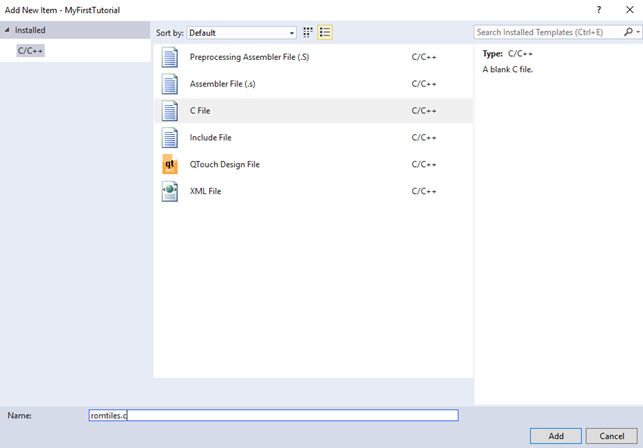
- Finally, let’s create the romTiles.c file. Like step 3, right click on the project name on the solution explorer, select “add” and then “new item”.
- This time, select C file, and give the name “romtiles.c”.
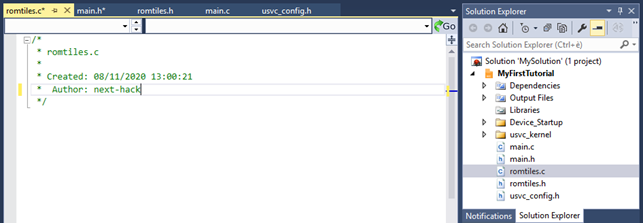
- Click on the romtiles.c on the solution explorer, and you should see an empty file (except some comments).
- From the romtiles.c we gave you, copy everything AFTER the line “
//Put the following lines in a .c file”in the romtiles.c. (alternatively, you can just copy the whole file, and remove the first lines up to the previously mentioned comment. Or alternatively you could copy the romtiles.c file in the project directory and add it as existing item, deleting the first rows up to the same comment). - It should be now like this:
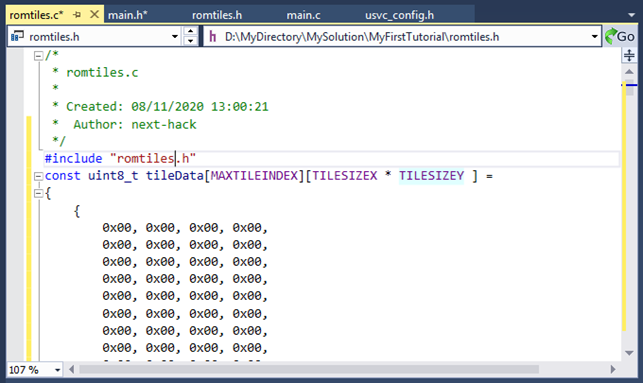
- Of course, now you have to change “the header file in which you put the previous line.h” to the name you gave in step 4 (in our case romtiles.h). It should be now like this:
- Press F7, to build the program, to check that everything runs fine. It should give 0 errors and warnings.
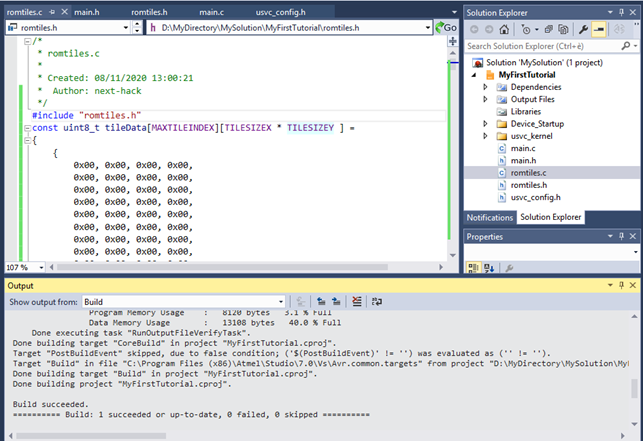
Of course, if you tried and uploaded the code to uSVC, you would just achieve a black screen, and a blinking LED on uChip, showing that it’s alive. But of course no graphics is shown. We need to create some code.
The main function
The main function (in file “main.c”) is where the set up and the game loop (or a call to the game function) should reside. How everything is organized depends on you. You might want to have a small main.c file, which includes only the initialization and a small loop where you call your game function. Or you might be a fan of “few but big files”: the choice is yours.
Let’s have a look at the main.c file of the template project:
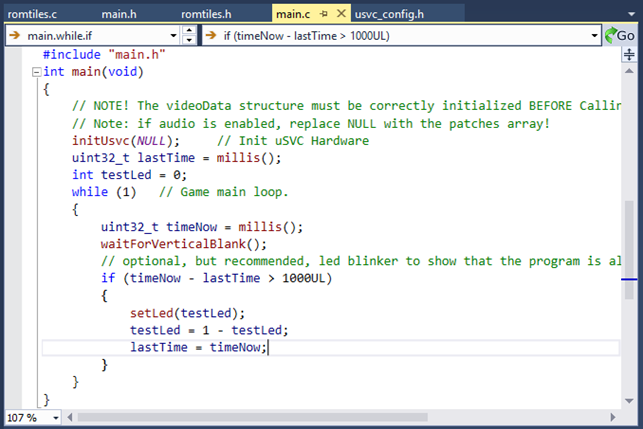
In any case, as a first operation, you must call the initUsvc() function. This function takes as parameter the array of sound patches. Since we won’t use audio (it is disabled by default) you can put NULL, i.e. just make a call to initUsvc(NULL);
Generally, when using advanced graphics features (such as row remapping, etc), you must initialize the videoData structure BEFORE calling initUsvc (). However, in this example we just use plain TILE_MODE1, with no other particular parameters. initUsvc will initialize the VGA signal generator, the audio (when enabled) and the USB stack (when enabled). Also, when enabling audio, never put NULL!
After initUsvc (), one typically puts other initialization stuff, and the game loop, i.e. a while(1). In the template file, the while(1) loop is already present, and it also contains a small snippet of code, to make the uChip built in LED blinking when it’s running. This notifies us that uChip is alive, as mentioned before.
The while(1) loop also contains the function call “waitForVerticalBlank()”. As its name suggests, this function will block the program execution (note that the screen drawing is done in interrupt, and this is never halted!), until we enter the blank phase, i.e. where the VGA color signal generation is not being performed. All the graphics operation should occur AFTER that function call.
As said before, if you compile (F7) there should be no errors. Upload this example in debug mode to uSVC, using the procedure we described in “uploading games in debug mode to uSVC” in the previous article.
If you now connect uSVC to a VGA monitor, you should see… nothing, a black screen! However, the monitor should not complain that there is no signal. In fact, the signal is present, but uSVC is just outputting black pixels. Furthermore uChip’s LED should blink about once per second.
Tiles
Now that your project has been set up, and since we already have provided you with the graphics, we are ready now to draw some tiles on screen. As you will see, this is extremely simple! Only static images will be drawn for now: we will cover scrolling in a future post.
Before showing how to place a tile, we want to give you a little background on how it works.
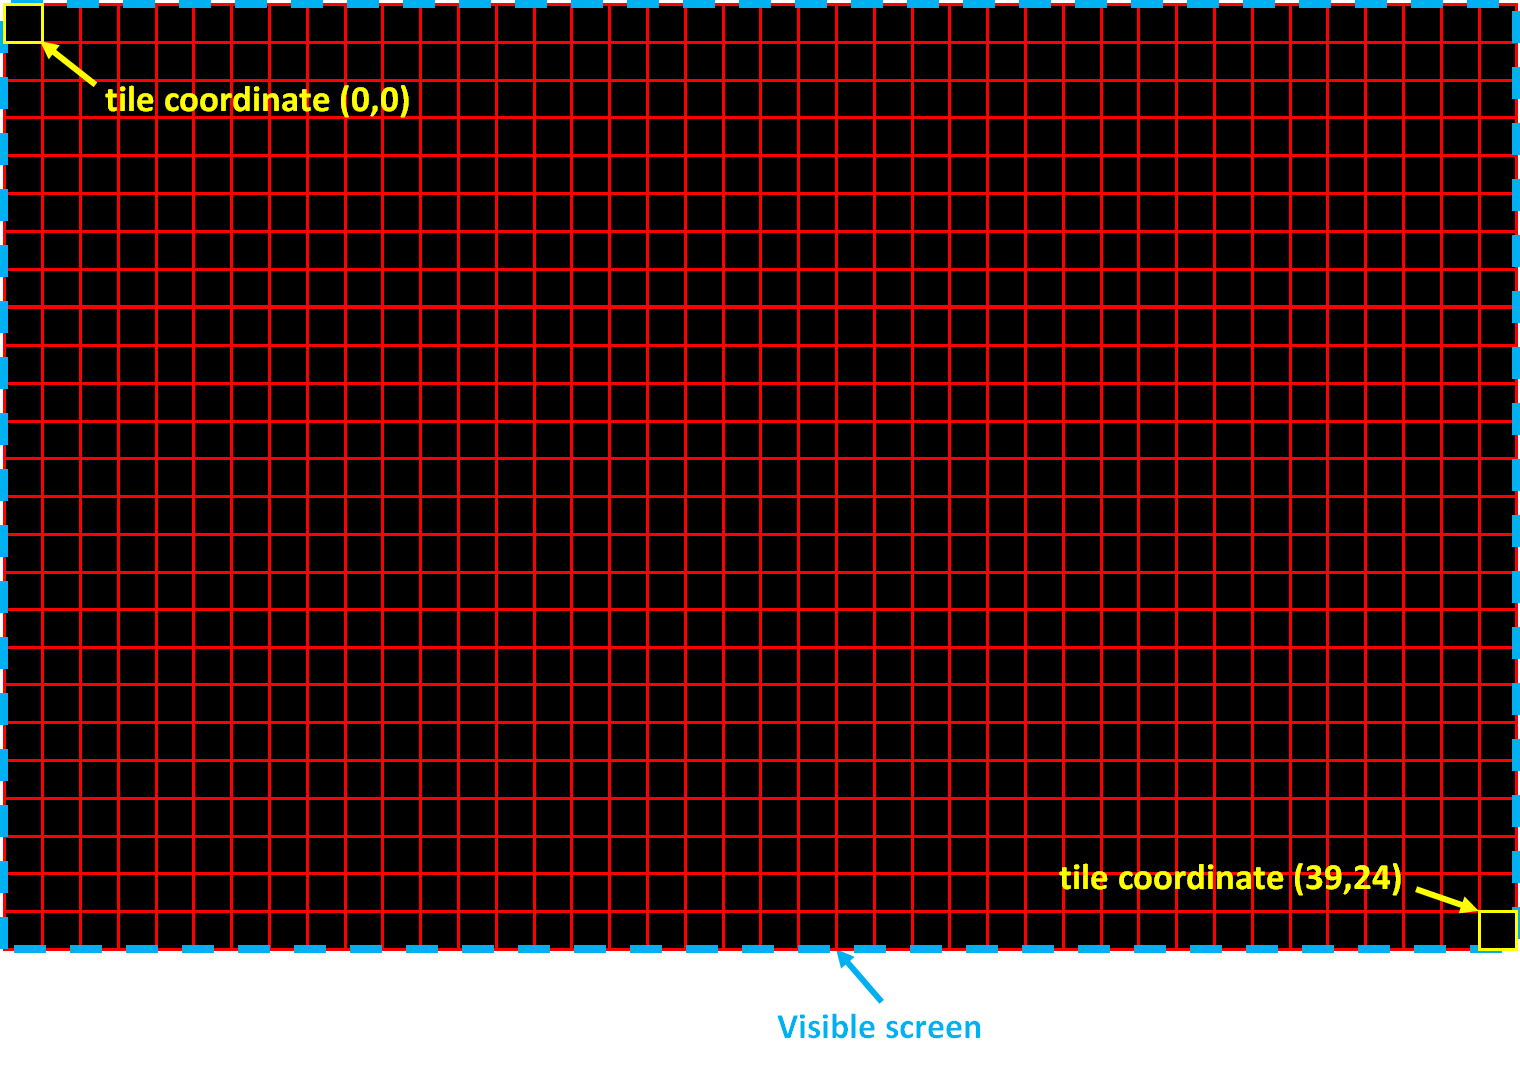
Unlike standard bitmapped modes, in tiled modes there are no directly accessible pixels, but tiles, which are small 8×8 pixel images. The screen is divided in blocks, each one being 8×8-pixel large, and each one of these blocks is set to show one of those images. Several different blocks can contain the same tile, but of course one block must contain one, and only one tile. A 320×200 screen will have therefore 40×25 blocks. The following image shows how the screen is divided and the tiles coordinates.
To choose which tile must be shown in a particular position , we use a table (actually it’s an array), called “vram”, which stands for video ram. As we will see in a future article, to support scrolling, the vram table is generally larger than the minimum 40×25. Furthermore, even sizes are generally used, therefore typically we deal with 42×26 table sizes. The horizontal vram size is called VRAMX, while the vertical size is VRAMY. These values are set in usvc_config.h. However, in this example, a static image will be shown, without scrolling, so we can set VRAMX to 40 and VRAMY to 25 (i.e. we leave the default settings).
To set the vram table, i.e. to place a tile, one needs only to call the function[1]:
placeTile(x, y, tileNumber);
x and y represent the coordinate, in tile blocks, i.e. if VRAMX = 40 and VRAMY = 25, the coordinates range from 0,0 to 39,24. tileNumber represent which tile of the tile set in RAM (see immediately below) should be placed.
As we have just written, we need to specify the “tileNumber”, which indicates which of the tiles stored in RAM should be placed. Yes, we really meant RAM, because one must copy the tiles from the flash to the RAM[2], before actually being able to draw tiles. This operation must be done only each time we need to change the tile set, for instance when we change level (with different graphics) in the game.
In the files we have provided, the tiles are stored in a const array, which is therefore in flash. These tiles must be copied in a particular global array, which is called “tiles”. The size of this array is determined by the number of tiles (MAX_TILES) we defined in uscv_config.h
To copy the tiles in ram, you have many possibilities. For instance you can call this function:
memcpy(tiles, tileData, sizeof(tileData));
Warning: by calling this function, you implicitly are assuming that in tileData there are at most MAX_TILES tiles. Always make sure that you have declared a large enough “MAX_TILES” when coping tiles!
So, what do we have to do? Before while(1), put “memcpy(tiles, tileData, sizeof(tileData));”, and then write “placeTile(20, 12,1);[3]”
The code so far should be like this.
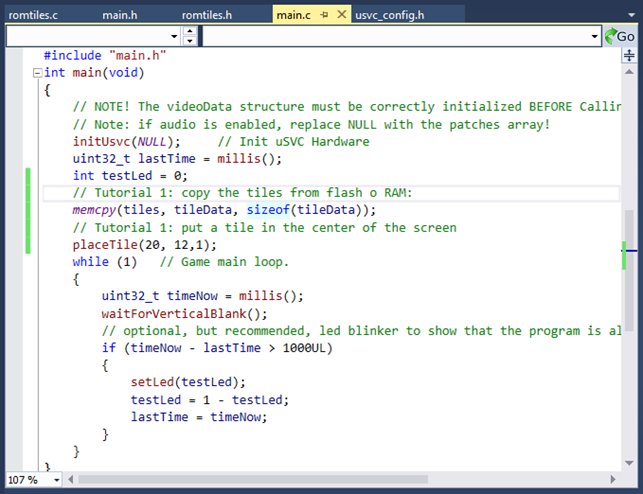
(Note: we just have added two comments that indicate what we are actually doing).
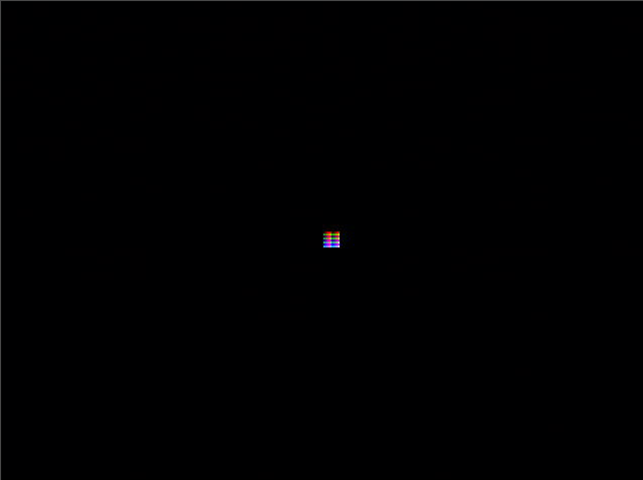
Now, compile, and upload it to uSVC in debug mode. You should see a colored square about in the middle of the screen. Congratulations, you have just drawn a tile!
Note! Some monitors might have issues in getting the right synchronization when the screen is almost empty. If your monitor fails to produce a similar output, the next step might solve the issue. In any case, check if the LED on uChip is blinking!
Maps
Let’s make a small step forward. In your game of course you won’t draw a single small square per screen. Of course you might want to draw something more interesting. Indeed, you could write a thousands of “placeTile()” calls, but… that would not very practical…
For this purpose, we use what we call “map”. A map is big table, which stores the level structure, i.e. it tells us where tiles should be placed. We have provided another file, called Tutorial1_gamemap.zip, where you will find gameMap.
The procedure to include the map is very similar to what we have done before for the tiles.
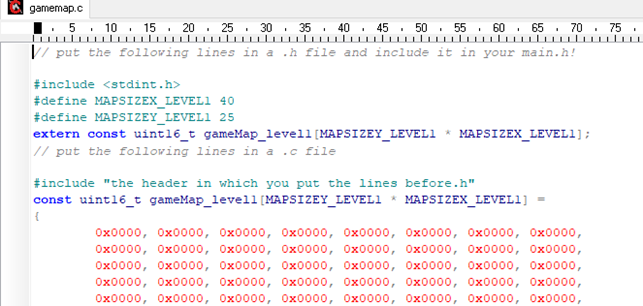
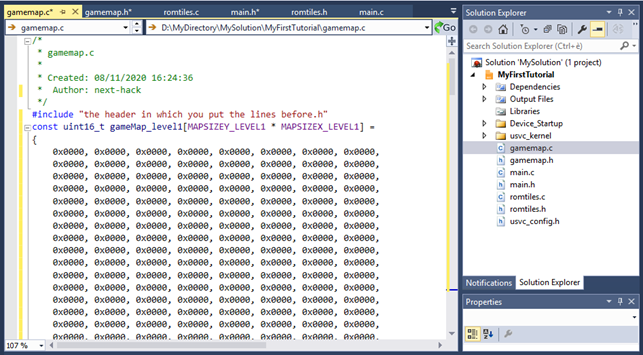
- Unzip the archive, and open gamemap.c with your favorite text editor. You should see something like this:
- Like you did in step 3 (for the file romtiles.h), create a new include file, but name it gamemap.h.
- Click on gamemap.h on the solution explorer, and copy from the gamemap.c opened with the text editor the first 4 lines of code, to get something like what is shown below:
- Include gamemap.h in the main.h, as shown below:
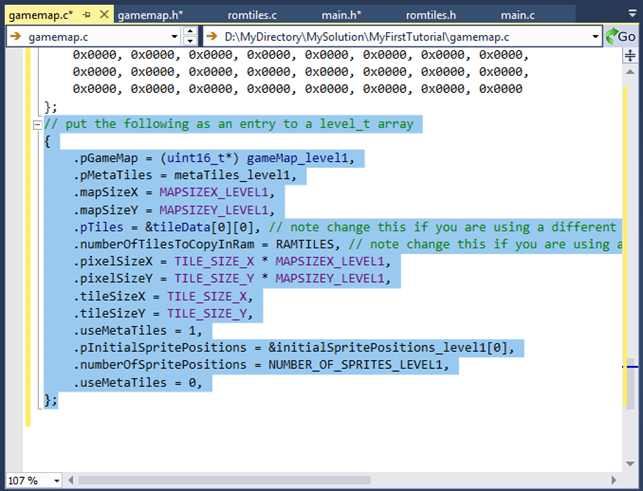
- Let’s create (as we did previously for romtiles.c) a C file, and put there the remainder of the gamemap.c, to have the following:
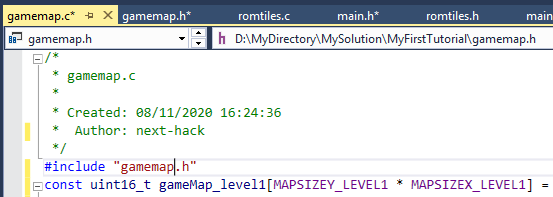
- Now we need two modification. The first one, is to change the include line, in order to include “gamemap.h”, see as detailed below:
- The second modification is at the bottom of the file. Scroll all the way to the bottom and remove the highlighted text, shown below:
We will cover that part when we will deal with more advanced tutorials.
- Now let’s create a function, called drawMap, that copies part of the map to the vram.
To draw a map onscreen we will have to copy for each x and y values (going from 0 to VRAMX and VRAMY), what is stored in the map. Typically, the map might be much bigger than the screen: for instance, in a platform game, the level spans several screens. Therefore the map has its own x and y sizes, which, in this example are called MAPSIZEX_LEVEL1 and MAPSIZEY_LEVEL1.
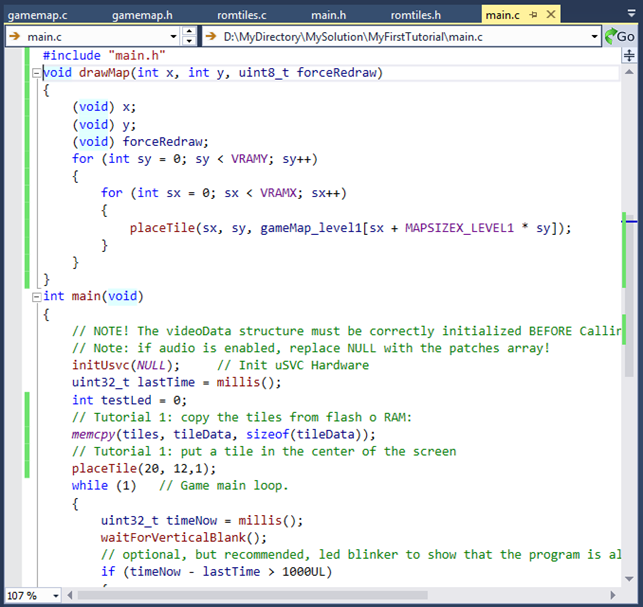
The drawMap should be like this:
void drawMap(int x, int y, uint8_t forceRedraw)
{
  (void) x;
  (void) y;
  (void) forceRedraw;
  for (int sy = 0; sy < VRAMY; sy++)
  {
    for (int sx = 0; sx < VRAMX; sx++)
    {
      placeTile(sx, sy, gameMap_level1[sx + MAPSIZEX_LEVEL1 * sy]);
    }
  }
}
You can place this function just before the main, or, if you place it elsewhere, remember to put its declaration before the main() function. For instance, you will have something like this:
Noticeably, the function takes as parameters x, y, and forceRedraw but we don’t use them, for now. Therefore, the purpose of the first three lines is just preventing the compiler from throwing warnings because we did not use these function parameters.
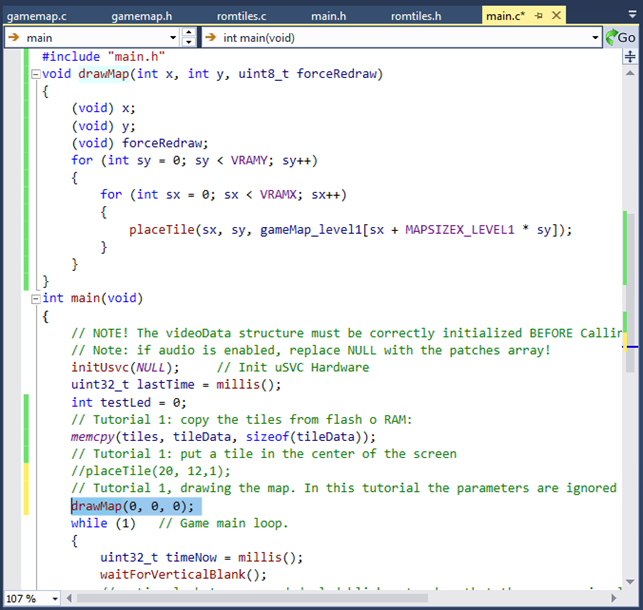
- Make a call to drawMap somewhere in your code (since we are not doing anything, the map can be just drawn even only once, so you can put it also before the while – loop). Your code might look like this:
- Now compile, and upload it to uSVC in debug mode. You should see this screen!

If you see that screen, congratulations, you have completed your first tutorial!
We strongly encourage you to unleash your creativity, make some graphics, use the uChip Game Map Editor, and import it this project.
As an exercise for the experienced programmers, we leave to you the modification of the “drawMap” function. We did not use the x,y parameters, yet. You should modify that function so that x,y represent a (positive) offset, at which the gamemap is drawn. Of course you’ll have also to create a much bigger game map (than only one screen). In this way, you will achieve a tile-based (8-pixel) scroll. We will show later how to achieve a pixel-based scroll!
If you can’t manage to do this do not worry: the solution will be shown very soon…
Before smooth scrolling, we need to talk about sprites. In the next tutorial we will cover them, as they are another important element of uSVC (and in general for 8-16 bit gaming consoles).
[1] This function is “inline”, therefore it is as fast as a macro! It actually implements: vram[y*VRAMX + x] = (uint32_t) &tile[n];
[2] As we wrote in the introductory article, flash does not allow constant 0-wait state accesses, while RAM is accessed with 0 wait states, i.e. at full speed. uSVC VGA signal generator needs full speed accesses, therefore all the tiles that are shown onscreen must be copied to RAM.
[3] Actually for this example, it does not matter where this line is placed!
Great tutorial! But it seems like the Tutorial1_gameMap.zip link is pointing to Tutorial1_romtiles.zip url instead. I was able to find it, but fixing that would surely help others following this tutorial in the future. Thanks!
Thank you! Fixed!