


As well described on the home page of the project: “Emoncms is a powerful open-source web-app for processing, logging and visualising energy, temperature and other environmental data.”
To explain a bit, Emoncms collects data from different sources and lets you store them and visualize with wysiwyg web interface.
In this article we are not discussing about how to use or configure Emoncms. Our aim here is to share with you some hints on web interface personalization that we fount useful in our projects, and we think they may be userful also for others.
Widget > Led
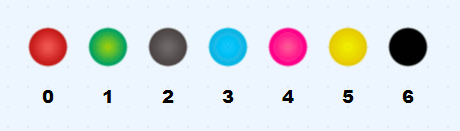
If you need to add a “Led” widget, you can find by default only a led which color is varying depending on the integer value it is associated to. That means 0: red, 1: green, 2: grey, 3: cyan, 4: pink, 5: yellow, 6: black.
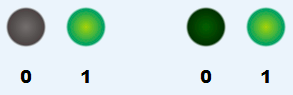
But it’s more common that you need a led with a fixed color, switching on and off on according to a binary variable. For example a green led, switching on (green colour) when the associated varable is 1 and turning off (grey colour or dark green colour) when the variable is 0.
So let’s see how we can customize emoncms widgets to fit our needs.
How to:
First of all, we remind you to make a backup of your existing configuration or to work on a test environment till you get familiar with the following steps. What we are doing is really easily affordable by anyone with just the basic knowledge of coding.
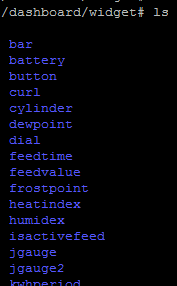
Once backup is done or test environment available, we should get access to the webserver folder. Depending on your environment and preferences (we are using Debian, and it’s under /var/www/ ) you’ll have an emoncms folder containing multiple folders and files. We should go into ./emoncms/Modules/dashboard/widget/ once there you can list the content and you’ll find a folder for each of the widgets in the dashboard interface.
Now we make a copy of the ./led folder and we call it ./ledGyGr (meaning Gray/Green). Then we go inside the folder ./ledGyGr and we rename the led_render.js file into ledGyGr_render.js
cd /var/www/emoncms/Modules/dashboard/widget/
cp -a ./led ledGyGr
cd ledGyGr
mv led_render.js ledGyGr_render.js
Then you can run your favourite text editor (we use vi) and start editing the just renamed file, or you can download our template and start from it (rename it from .template to .js). If you start from our template you have just to find the string “GyGr” and change with your favourite customization, according to the functions/colours you’re implementing.
So the first step is to change any referral to the old name into the new name and then it is possible to change the shades. In the template file you can search for gray and you’ll find the corresponding hex format of rgb (#rrggbb rgb to hex). The word gray will occour two times, as the colors are defined either for the gradients or for the solid fill. In case of gradients the first is the inner colour and the second is the outer one. So you have to replace the color scheme to the one you need.
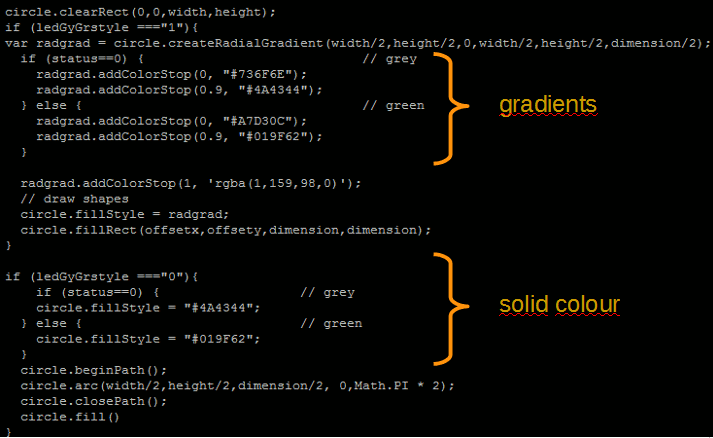
With the changes on the example file, if the value associated to the ledGyGr is 0 then the led will appear grey, while for any other value the ledGyGr will shine green.
Many variants can be made from now on. For example you can create a useful led which behave on the opposite, being “on” for a 0 value and “off” for any other one. Or to create a bi-colour, or as many flavours as you like, led.
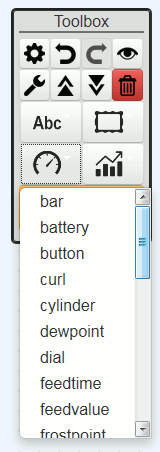
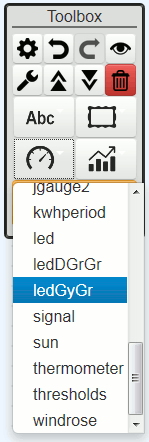
Once the file is correctly edited, a new line will appear on the drop-down list, from which you may choose your customized led widget.
In further articles we will cover other customizations on different elements of emoncms. Stay tuned!