
Hi there! Let’s continue with our tutorial series. This time we will explore another important part (maybe the most important in videogames?), i.e. the input.
uSVC uses USB gamepads or keyboards as inputs. The USB stack we implemented is hot swap and plug and play, i.e. the USB peripherals can be inserted anytime, and they will be “installed” right away, provided that there is a driver available for that peripheral. Luckily, we already created drivers for standard keyboard and gamepads, so pretty most of keyboards and gamepad will work, without any effort.
For this tutorial we are going to use the keyboard (and later the gamepad) to navigate (i.e. scroll) around our map. Therefore you need to copy (and rename) last project we made for the smooth scrolling tutorial.
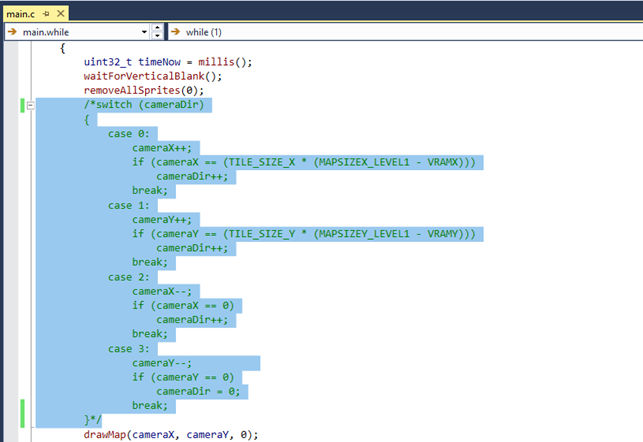
Before including the USB code, we need to disable the routine that scrolled automatically the screen with a rectangular pattern. To do this, comment the highlighted section below:
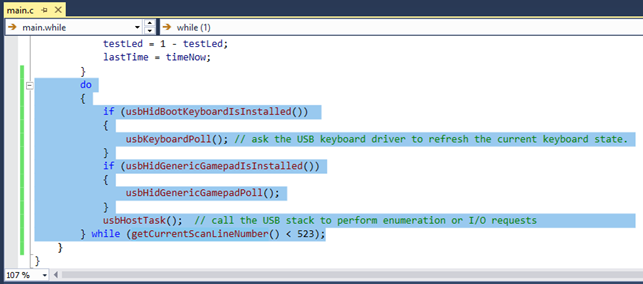
Now, let’s add USB support. Let’s first add the following snippet that allows to poll data from the keyboard or gamepad. The snippet should be added at the end of the main while(1) loop, as shown below:
Let’s analyze it.
In order for the USB host stack to work, the usbHostTask() should be called at least once per frame. It is not a problem if this function is called more than once, and actually, to speed up enumeration (i.e. device recognition and driver installation), we call usbHostTask() as many times as we can, depending on how much time is left for the USB. For this reason we use a do...while() loop.
In this loop we also poll several times the keyboard or the gamepad (if they are installed) to get the data. Note that calling the poll function does not actually initiates any I/O transaction. The poll function will simply reserve an I/O transaction (if not already reserved), which will be performed when the usbHostTask() will be called. Calling the poll function more than once is not an issue, and actually it might be useful, if, for any reason, the packet is corrupted or the USB device was not ready, when we polled it previously. When a poll transaction is successfully executed by the usbHostTask() function, the current device state (e.g. pressed keys, gamepad axis state, etc) will be updated.
The loop runs until the currentScanLine number is smaller than 523 (i.e. 524-th line).
Why we do not include the lines 523 and 524?
Because the USB host task might be quite time consuming, and we do not want the currentScanLine to wrap to 0 in the loop: this would results in several issues such as glitches, frame drop and, in the worst case, even deadlock (the do…while loop would never exit).
After we poll for data, we need to process what we got from the driver.
A keyboard and a gamepad of course are different: a USB keyboard has about 100 keys, while the gamepad have some buttons, the d-pad and possibly some analog joysticks. The included gamepad driver returns the axes status (up to 4 axes) and the button status (up to 32 buttons), while the keyboard driver offers different possibilities: reading the keypresses already in the ASCII format (using a the standard US keyboard layout), or reading the raw keyboard codes. It is up to the game developer to decide how to get and interpret the input data, and how to unify the two input methods. In our games, for sake of simplicity we decided to convert the gamepad inputs to an equivalent keypress on the keyboard, so the game only has to check which keyboard keys were pressed.
Furthermore in the game examples, we did not use raw keyboard status, but the key already decoded in the ASCII[1] format.
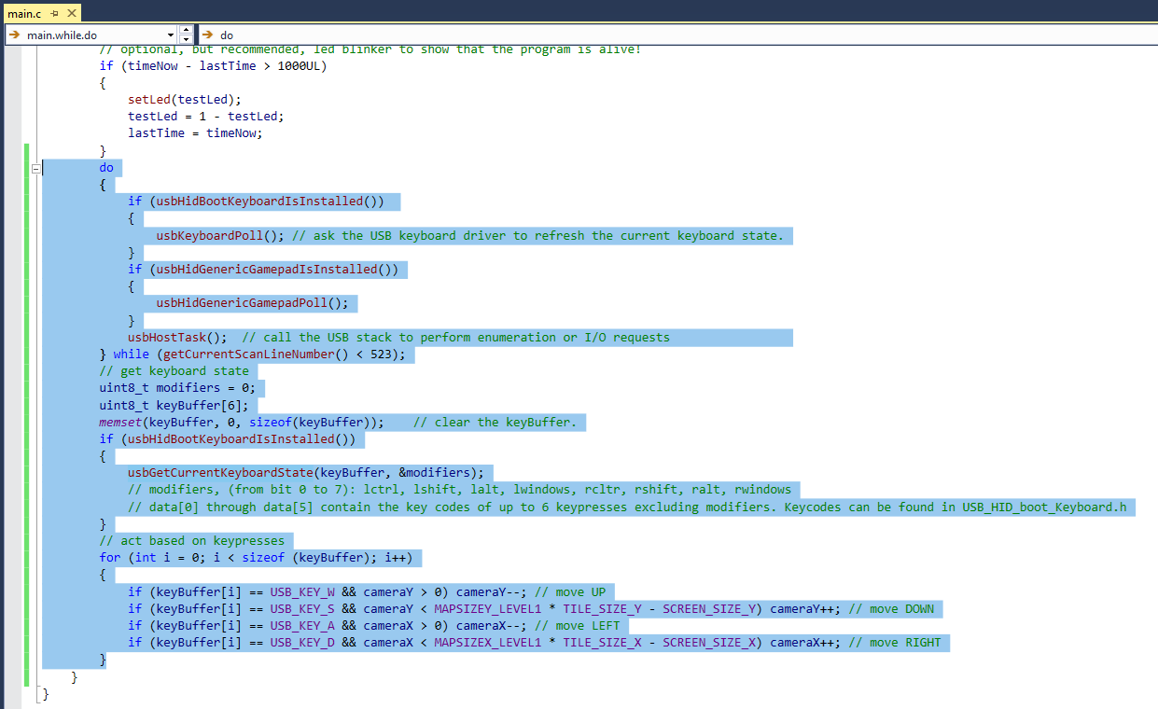
This latter choice has the following limitation: key modifiers (Ctrl, Shift and alt) are not considered as separate keys, but they are used to create, together with the other keys, an equivalent ASCII character. However, not all the ctrl and shift combinations are actually decoded. Furthermore, alt is not even considered. In other words, Ctrl, Shift and alt are not well supported by this method. A better one is to get the raw keyboard status using this snippet (only the keyboard section is shown):

The snippet above should be placed after the previous do…while() loop.
In this tutorial we will proceed using the raw key codes. For now, we use only the keyboard, getting the gamepad data later.
We use the keys “wasd” to move (i.e. scroll) the screen. To do this, we simply act on cameraX and cameraY variables based on which keys have been pressed. Note that up to 6 keys might be pressed at once, therefore an additional for-loop is required to scan all of them. The whole USB-related handling should be like as follows:
Let’s compile and upload the code to uSVC in debug mode (see guide on the previous article).
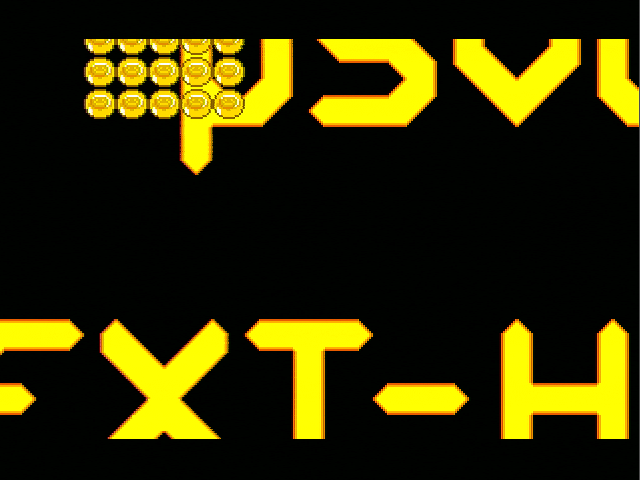
Connect to the uSVC a micro usb to USB-A adapter, and then connect the USB keyboard to the adapter. You should see the keyboard LEDs turning on for 1 second, indicating that the keyboard driver has been installed and it is ready to return data. This is handled by the usbHostTask() function, which also handles the poll requests. Now, with the keyboard you should be able to move around the screen.
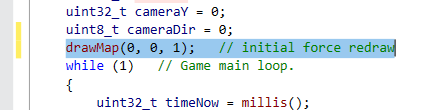
Noticeably, you should see something strange: initially you should see only the sprites, but, later, if you press any of the WASD key, you should see the background appear again. This is due to the drawMap() function, which initially does not redraw the map, because it thinks that it was already drawn (see previous post). To avoid this glitch, just write drawMap(0, 0, 1); (i.e. with non zero forceRedraw parameter) before the while(1); as shown below:
Let’s add gamepad support now:
We will still use the same strategy we used on our example games: gamepad actions are converted to keys, using a small code snippet shown below.
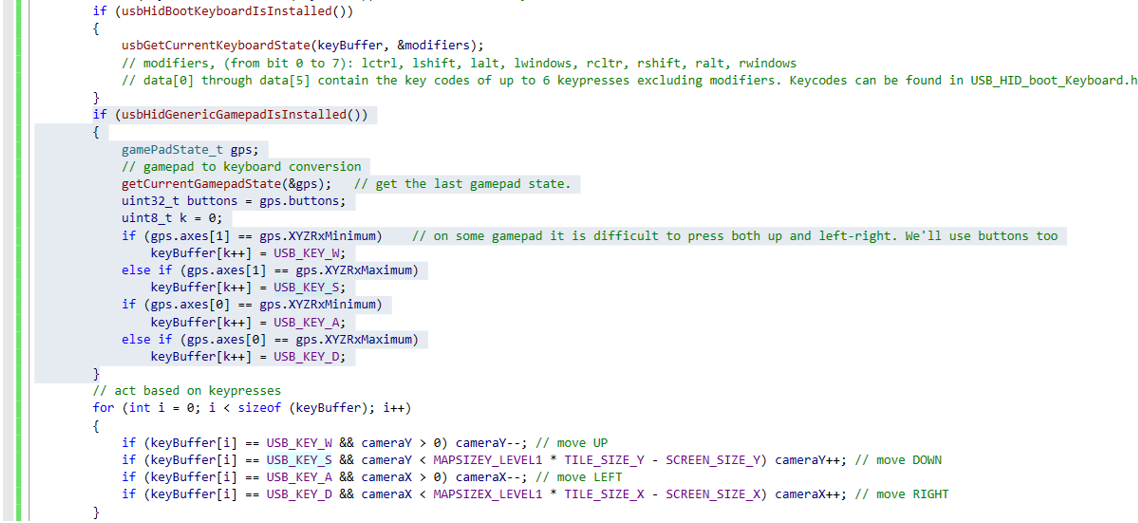
As you can see, we just convert the gamepad axes status to the keypresses, so no other modification is required.
Let’s connect uSVC again to the PC, and build and upload the program. Now you should be able to move around in the map, with the gamepad too!
As a homework, we leave you a small task: instead of scrolling the screen, try to move the sprites!
This is all for this week, however, think about this: now you already know all the basics to create your first game: you can draw tiles and sprites, you know how to produce smooth scrolling effects and how to get the keyboard/gamepad input…
Well, yes, but we are still missing sound… This will be covered in the next tutorial!
[1] And if no ASCII code can be generated with a particular key, the key code is put in the MSB of the 16 bit integer.